Setting up your Brother printer has never been easier, thanks to the user-friendly brother printer installer. In this comprehensive guide, we’ll take you through the step-by-step process to ensure a smooth and hassle-free installation, allowing you to start printing in no time.
Keywords: Brother printer installer, Brother printer setup, install Brother printer, Brother printer software, configure Brother printer
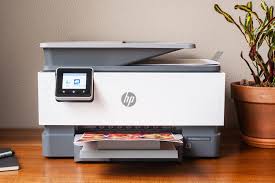
Step 1: Unbox Your Brother Printer
Begin by carefully unboxing your Brother printer and ensuring that all components are present. This includes the printer, power cord, USB cable (if applicable), ink or toner cartridges, and any installation CDs or manuals.
Step 2: Connect Power and Turn On
Plug in your Brother printer using the provided power cord and turn it on. Ensure that the printer is connected to a power source and is in a convenient location with proper ventilation.
Step 3: Connect to Your Computer
For a wired connection, use the USB cable to connect your Brother printer to your computer. If you prefer a wireless connection, navigate to the printer’s control panel to connect to your Wi-Fi network. Follow the on-screen instructions, entering your Wi-Fi credentials when prompted.
Step 4: Download Brother Printer Installer
Visit the official Brother website (https://support.brother.com) to locate the appropriate Brother Printer Installer for your printer model. Download the installer file to your computer. Ensure that you download the correct version compatible with your operating system, whether it’s Windows or macOS.
Step 5: Run the Installer
Locate the downloaded installer file and run it to initiate the installation process. Follow the on-screen instructions to complete the installation. The installer will guide you through essential setup steps, such as selecting the installation language and agreeing to the terms and conditions.
Step 6: Choose Connection Type
During the installation process, you will be prompted to choose the connection type for your Brother printer. Select the connection method based on your setup – either wired USB, wireless, or network connection. Follow the instructions to configure the chosen connection type.
Step 7: Install Printer Drivers
The Brother Printer Installer will automatically detect your printer model and install the necessary drivers. Allow the installation process to complete. This step is crucial for enabling your computer to communicate effectively with your Brother printer.
Step 8: Print a Test Page
Once the installation is complete, it’s recommended to print a test page to ensure that your Brother printer is functioning correctly. This helps verify that the drivers and connection settings are configured accurately.
Conclusion:
With the brother utilities download windows 10, setting up your Brother printer is a breeze. By following these step-by-step instructions, you can effortlessly install the necessary software, connect your printer to your computer, and start printing without any hassle. Whether you’re a tech novice or an experienced user, the Brother Printer Installer streamlines the setup process for a seamless printing experience.