
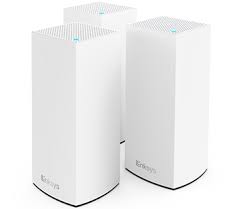
To increase the wireless signal on your network, use the Linksys Velop AC1300 Setup. Whether you wish to expand your coverage or are experiencing dead zone problems, the AC1300 can be of help. This tutorial will walk you through the setup procedure step-by-step.
How to configure Linksys Velop AC1300 using Manual method
Follow these manual instructions to set up your web browser and manually configure your Linksys Velop AC1300 Extender:-
- First of all, The Linksys Extender’s light should become completely green when it is attached.
-
Get a laptop or smartphone that can connect to wifi.
-
192.168.1.1 or Extender.linksys.com should be entered into the address bar of any web browser, including Chrome.
-
Enter “admin” as the username and password, as this is the standard setup.
-
It is necessary to input the SSID, password, and security under “Wi-Fi Settings.”
-
Then you will follow the instructions that will be given.
-
After completing the instruction setup procedure, select the wifi network you currently use, provide a password if required, and click the next option.
-
The extension that was placed where the internet was weak will thereafter be moved.
-
You were able to improve your wifi service by successfully applying the manual method.
Now that this configuration is complete, we may easily manually connect to the internet at home and at work.
Linksys Velop AC1300 Setup via WPS method?
Your current WiFi network’s performance and coverage will be greatly improved with the Linksys Velop AC1300 WiFi Range Extender. Using the WPS (Wi-Fi Protected Setup) settings on the extender and the Linksys Velop AC1300 Setup, connecting to a reliable and secure network is also quick and simple.
- Initially, we require a router or extension, and both need to have a WPS button.
-
The extension should first be plugged into a nearby power socket near the router.
-
Hold off until the Linksys velop Ac1300 power LED turns green.
-
You push the WPS button on the extension. After a little period, you repeat this process and press the same button on the router.
-
When the connection is established successfully, the extender’s WPS LED turns solid green.
Linksys velop AC1300 Setup common problems
A Linksys AC1300 Wi-Fi range extender’s installation can occasionally be difficult because of numerous aspects including placement, setup, and compatibility. Here are some typical issues that users could run into during Linksys Velop AC1300 setup and their fixes:
-
Internet connection, but it is not working.
-
Extender.Linksys.com not working
-
Can’t connect to Linksys.Extender.com local
-
Incorrect Extender.linksys.com password.
-
Utilise your account details for logging in.
-
Can’t access linksys.extender.com
-
Issues while accessing the 192.168.1.1 IP address.
-
WiFi connectivity issues.
-
Netgear Genie smart setup page continues to appear even after the Linksys AC1300 Setup.
-
Forgot the Linksys Extender default password?
-
The extender’s LED lights are not stable.
-
Extender.Linksys.com doesn’t open.
-
I can’t log in to the Linksys AC1300 extender.
-
AC1300 drops internet connectivity.
-
I can’t access Extender Linksys.com after the update on AC1300 Unable to update firmware.
-
AC1300 is not working after a failed update.
-
No internet connection is present on the WiFi extender.
Troubleshooting Steps:
If you encounter issues regarding Linksys velop AC1300 setup,consider these troubleshooting:
-
Check to see if the wall socket is providing sufficient power for the Linksys velop AC1300 Extender.
-
Ensure that the electrical outlet to which the extender is linked is working properly and is not experiencing a short circuit.
-
Access verifies that your device has a strong internet connection.
-
Verify all wiring connections. Any cables that are broken should not be used.
-
Make sure you’ve typed the right URL in the address box if you’re experiencing issues with Extender.linksys.com
-
Try setting up your Linksys extender again after doing a power cycle.
-
When logging onto extender.linksys.com, only use the most recent version of the web browser.
-
Update the firmware on your extender to the most recent version Linksys offers.
-
restore the extender’s factory default settings.
Updating Linksys Velop AC1300 Firmware
Updating the firmware is a special benefit if your extender is upgraded and works efficiently, rapidly, etc. I shall thus start the firmware upgrade procedure and adhere to it.
- You should have your device linked to the Linksys Velop network.
-
Next, use a web browser, type in the IP address (192.168.1.1) or web URL (Extender.linksys.com), and log in using the configured or personalised login.
-
Locate the firmware upgrade under administration or settings, and then follow the on-screen instructions.
-
After searching for updates, you find the firmware update, click it, and the router reboots itself automatically a short while later.
-
In order to prevent you from disconnecting and shutting down your router, it will automatically reboot.
Linksys Velop AC1300 Reset Process
The Linksys Velop AC1300 system may be reset to its factory settings. Below is a step-by-step manual for resetting the Linksys Velop AC1300:
- Find the reset button on your device first.
-
There may be a reset button on the side panel of your smartphone. There is a tiny hole in this side button where you may put a paperclip and keep it there for ten to fifteen seconds.
-
then your device’s side light will start to flicker.
-
After a few minutes, your smartphone will shut off on its own and the reset process will be completed.
-
Use caution when resetting your Linksys Velop AC1300 system with this step.
This step to carefully to reset your Linksys Velop AC1300 system
If you have problem with your Setup ,you can contact our professional expert or dial our Toll free number (+1-323-471-3045) or email: [email protected]