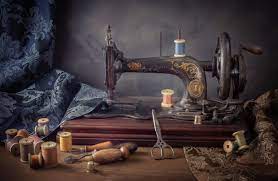
How to Use a Free computer controlled embroidery machine Motion Embroidery Machine
Free motion embroidery, also known as stitch painting, can be described as using your sewing machine to draw with thread. While its technique may appear straightforward at first, mastery takes practice to get both hands working harmoniously in unison.
Need an embroidery or darning foot, plus your sewing machine needs its feed dogs lowered? Referring to your machine manual should help guide this process.
Needle position
Machine embroidery can be both fun and rewarding; however, for beginners it can also be daunting. In order to maximize the process, it’s crucial that beginners understand how to set up their sewing machine properly as well as prepare the fabric properly before beginning free machine embroidery. Mark your intended design on fabric before beginning as this may help prevent frustration later.
Start off by gathering all of the tools required for free motion embroidery: darning foot, machine capable of free motion embroidery, feed dogs with lower feed dogs (the little teeth under your needle) lowered, standard presser foot switched out for the darning foot with its open space that enables visibility of your work; consult your manual on this. Once these basics have been taken care of, begin stitching slowly while keeping thread tension high to avoid tangled threads!
Thread tension
When embroidering on a machine, fabric must be freely moveable in all directions. To accomplish this, the feed dogs on your sewing machine need to be lowered – each brand of machine offers different instructions on how to do this. You will also require an embroidery foot or darning foot for your machine as each makes has different requirements; using one will protect your fingers from needle punctures while helping you create unique designs.
Once you have lowered the feed dogs, attached the appropriate foot type, and hooped your fabric, you are ready to begin free motion embroidery. Begin by stitching slowly while “doodling” on the hoop to gain confidence with free motion embroidery; practice until your stitches become consistent and neat before beginning to experiment with various patterns or thread tension alterations to create unique effects; for instance you might try double thread or variegated thread for additional colour and texture in your stitches.
Stitch length
Your sewing machine’s feed dogs are typically designed to help guide fabric through the needle, but in free motion embroidery they need to be lowered. Consult your manual on how this should be accomplished; there may be a switch or digital screen you need to flick, or it could simply be a matter of pressing down on something special for this technique. One effective method for doing this is with a darning foot specifically made for free motion embroidery that has more fabric contact area and provides clear visibility as you work.
Before embarking on your design, it is also beneficial to practice stitching on scraps of fabric as this will allow your feet and hands to coordinate properly. Your brain might be used to thinking that pressing down harder on the pedal means faster fabric movement – however in free machine embroidery this needs to be the opposite!
Hoop
Free-motion embroidery machines are exciting yet daunting, yet there are numerous resources online that can help get you started, such as tutorials, blogs and You Tube videos. Additionally, many embroidery machines provide different settings that enable different stitches.
As with any new skill, starting off with straight stitches on your machine and practicing them on scrap fabric until you become comfortable with their movements is recommended. After this is accomplished, switch over to zig-zag stitches and begin filling out your design.
Use only high-quality embroidery thread, as this helps protect both your machine and achieve higher-quality results. Thread weight classification generally allows for faster filling times while finer threads offer greater detail for shading; aim for a balance between them both!