
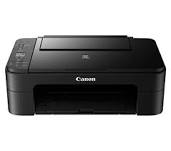
Setting up a new printer can be a daunting task, but with the right guidance, it can be a breeze. If you’ve recently purchased a Canon printer, you’re in luck! Canon provides a user-friendly platform called http://ij.start.canon, which offers a seamless setup process. In this step-by-step guide, we’ll walk you through the process of setting up your Canon printer using http ij start canon, ensuring you can start printing in no time.
Step 1: Unbox and Prepare Your Canon Printer
The first step in setting up your Canon printer is to unbox it and ensure you have all the necessary components. Check for items like the printer unit, power cord, ink cartridges, and any additional accessories provided. Place the printer on a stable surface near a power source and your computer.
Step 2: Power On the Printer
Plug the power cord into the printer and an electrical outlet. Press the power button to turn on the printer. Wait for the initialization process to complete.
Step 3: Install Ink Cartridges
Open the printer cover and install the provided ink cartridges according to the manufacturer’s instructions. Close the cover securely.
Step 4: Connect the Printer to Your Network
Using the control panel on your Canon printer, navigate to the settings menu and select “Wireless LAN setup.” Follow the on-screen prompts to connect your printer to your Wi-Fi network. Make sure to enter the correct network credentials.
Step 5: Visit http://ij.start.canon
Open your preferred web browser and go to http://ij.start.canon. This website is Canon’s official platform for printer setup and installation.
Step 6: Select Your Printer Model
On the http://ij.start.canon website, you’ll be prompted to enter your printer model. Type in the model number or use the provided dropdown menu to select your specific Canon printer model.
Step 7: Download and Install the Printer Driver
After selecting your printer model, you’ll be directed to the download page. Click on the “Download” button to obtain the necessary driver software for your printer. Follow the on-screen instructions to install the driver on your computer.
Step 8: Complete the Setup Process
Once the driver installation is complete, your computer will prompt you to connect the printer to the computer using a USB cable (if not already connected wirelessly). Follow the instructions to establish the connection.
Step 9: Test Your Printer
Print a test page to ensure that your Canon printer is properly set up and functioning correctly.
Conclusion:
Congratulations! You’ve successfully set up your Canon printer using https//ij.start.canon. Now you’re ready to start printing documents, photos, and more. If you encounter any issues during the setup process, refer to the troubleshooting section on the Canon website or consult the user manual for further assistance. Happy printing!