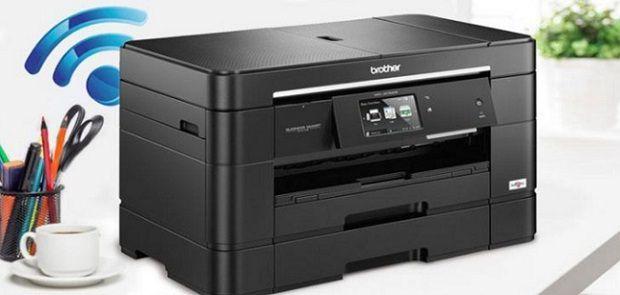
In the era of wireless connectivity, the ability to seamlessly connect devices is paramount. When it comes to printers, Brother has long been a trusted name, offering reliable and feature-rich printers suitable for both home and office use. If you’ve recently acquired a Brother printer and are wondering Connecting Brother Printer to Wifi, you’re in the right place. This comprehensive guide will walk you through the step-by-step process, ensuring a smooth and successful connection.
Understanding the Basics:
Before delving into the detailed steps, it’s essential to understand the basics of why and how you should connect your Brother printer to your router.
-
Wireless Convenience: Connecting your Brother printer to your router wirelessly eliminates the need for cumbersome cables, providing the flexibility to place your printer anywhere within the Wi-Fi range.
-
Multi-Device Printing: Wireless connectivity allows multiple devices, such as laptops, smartphones, and tablets, to print to the same Brother printer. This feature is especially beneficial in households or offices with multiple users and devices.
-
Enhanced Accessibility: Once connected to the router, your Brother printer becomes easily accessible by any device on the same network. This means you can initiate print jobs from different rooms or even from different floors if the router’s range permits.
Now, let’s proceed with the step-by-step guide on connecting your Brother printer to your router:
Step 1: Gather Necessary Information
Before initiating the connection process, gather the following information:
-
Network Name (SSID): The SSID is the name of your wireless network. You can find this information on your router or by checking the network settings on a device already connected to the Wi-Fi.
-
Wi-Fi Password: Ensure you have the correct Wi-Fi password. This password is required during the connection process to secure the wireless link between your Brother printer and the router.
Step 2: Power Up Your Printer
Before you start the connection process, ensure that your Brother printer is powered on and in a ready state. Check the printer’s display screen for any error messages and resolve them before proceeding.
Step 3: Access the Printer Menu
Navigate to the control panel of your Brother printer. This is typically a touchscreen display or a set of buttons that allow you to access various settings. The exact location of the menu may vary depending on your printer model.
Step 4: Navigate to Network Settings
Using the control panel, locate and enter the “Network” or “Settings” menu. This is where you’ll find options related to the printer’s connectivity settings.
Step 5: Select Wireless Network Setup
Within the network settings, look for an option related to wireless setup. It might be labeled as “Wireless Setup,” “Wi-Fi Setup,” or something similar. Select this option to initiate the wireless connection setup.
Step 6: Choose Your Network
The printer will now search for available wireless networks in the vicinity. Once the search is complete, a list of detected networks will be displayed on the screen. Find and select your Wi-Fi network from the list.
Step 7: Enter Wi-Fi Password
After selecting your Wi-Fi network, you’ll be prompted to enter the Wi-Fi password. Use the on-screen keyboard or the printer’s buttons to input the correct password. Take care to enter it accurately, as errors in the password can lead to connection issues.
Step 8: Confirm Settings
Once you’ve entered the Wi-Fi password, the printer will ask you to confirm the settings. Double-check that the network name (SSID) and password are correct. If everything looks accurate, proceed to confirm and initiate the connection.
Step 9: Establish Connection
The printer will now attempt to establish a connection to your wireless network. This process may take a minute or two. Once the connection is successful, you should see a confirmation message on the printer’s display.
Step 10: Print a Test Page
To ensure that the wireless connection is working correctly, it’s advisable to print a test page. Many Brother printers come with a built-in option to print a test page directly from the control panel. Follow the instructions on the screen to print a test page and check for any issues.
Step 11: Install Printer Software on Your Computer
To maximize the functionality of your Brother printer and enable seamless communication between your computer and the printer, you need to install the necessary printer software. Visit the official Brother website and download the appropriate drivers for your printer model. Follow the installation instructions provided by the software to complete the setup.
Step 12: Verify Wireless Printing
Once the software installation is complete, open a document or image on your computer and attempt to print it wirelessly. Ensure that your Brother printer is selected as the default printer, and the print job is sent successfully.
Troubleshooting Tips:
Despite following the steps diligently, you may encounter issues during the setup process. Here are some troubleshooting tips to help you address common connectivity issues:
-
Check Network Range: Ensure that your Brother printer is within the effective range of your router. If the distance is too great, the wireless signal may be weak, leading to connection problems.
-
Restart Devices: Sometimes, a simple restart can resolve connectivity issues. Turn off both your printer and router, wait for a few seconds, and then power them back on.
-
Update Firmware: Visit the Brother support website to check for any firmware updates for your printer model. Firmware updates can address potential compatibility issues and improve overall performance.
-
Verify Router Settings: Check your router settings to ensure that it is broadcasting the Wi-Fi network. If you’ve recently changed your router or network settings, make sure they are compatible with your Brother printer.
-
Recheck SSID and Password: Double-check the network name (SSID) and password you entered during the setup process. Ensure they are correct and match the information of your Wi-Fi network.
Conclusion:
Connecting your Brother printer to your router might initially seem like a complex task, but by following this comprehensive guide, you can do it with confidence. The wireless connection not only eliminates the need for cables but also opens up the convenience of printing from various devices on the same network. Remember to gather the necessary information, follow the on-screen prompts on your printer’s control panel, and install the required software on your computer for a seamless printing experience. With a successfully connected Brother printer, you’ll enjoy the freedom and flexibility that wireless printing brings to your home or office.